Laravelで1対多、多対多のリレーションを作る【トピックに対してコメントの投稿、トピックタグの指定】

1対多、多対多のリレーションのウェブアプリのサンプルを作りつつ、方法を解説する。
状況
元にして作るアプリの状況を解説する
1対多のリレーションを作る
Topicに対して、Commentを投稿できるようにする。そのために、1対多のリレーションを作る。
コメントのモデルの作成・トピックのモデルの編集
1対多のリレーションを作るため、まずは、Commentのモデルを作る。ついでに--migrationオプションを付けて、次項で扱うマイグレーションファイルも作っておく。
php artisan make:model Comment --migration
app/Topic.php、Topicのモデルを書き換える。
<?php

namespace App;

#use Illuminate\Database\Eloquent\Model;
use GoldSpecDigital\LaravelEloquentUUID\Database\Eloquent\Model;

class Topic extends Model
{
     protected $fillable = [ "name","content" ];

     public function comments()
     {
         return $this->hasMany("App\Comment");
     }

}
つまり、TopicはCommentを複数持つ関係にある。
app/Comment.php、Commentのモデルを書き換える。
<?php

namespace App;

#use Illuminate\Database\Eloquent\Model;
use GoldSpecDigital\LaravelEloquentUUID\Database\Eloquent\Model;

class Comment extends Model
{
     protected $fillable = [ "name","content","topic_id" ];

     public function topic()
     {
         return $this->belongsTo("App\Topic");
     }
}
つまり、CommentはひとつのTopicに所属する。これでCommentとTopicが繋がり、1対多の関係になった。
コメントのマイグレーションファイルを編集してマイグレーション
XXXX_XX_XX_XXXXXX_create_comments_table.php、Commentのマイグレーションファイルを編集する。
<?php

use Illuminate\Database\Migrations\Migration;
use Illuminate\Database\Schema\Blueprint;
use Illuminate\Support\Facades\Schema;

class CreateCommentsTable extends Migration
{
    /**
     * Run the migrations.
     *
     * @return void
     */
    public function up()
    {
        Schema::create('comments', function (Blueprint $table) {
            $table->uuid("id")->primary();
            $table->string("name",15);
            $table->string("content",2000);
            $table->uuid("topic_id");
            $table->foreign("topic_id")->references("id")->on("topics")->onDelete("cascade")->onUpdate("cascade");

            $table->timestamps();
        });
    }

    /**
     * Reverse the migrations.
     *
     * @return void
     */
    public function down()
    {
        Schema::dropIfExists('comments');
    }
}
注意するべきは、uuid("topic_id")に対して、外部キー制約のforeign("topic_id")とすること。外部キー制約のforeign()が無い場合、トピックが削除された時、そのトピックに投稿されたコメントがDBに置き去りになる。結果、どこからも参照されないコメントのレコードが溜まっていき、DBがパンクする。
トピックが削除された時、コメントも同時に削除してほしいのであれば、外部キー制約のforeign()にonDelete("cascade")とする。これで、トピックが削除された時、同時にコメントまで削除される。
この外部キー制約とはtopicsテーブルとcommentsテーブルが外部キー(topic_id)で紐付いている事をDB構築時に設定するものである。
この状態でマイグレーション実行。
php artisan migrate
コメント投稿のコントローラを作る
app/Http/Controller/TopicsController.phpを編集。showアクションにコメント一覧の参照処理を追加、コメントへの投稿を受け入れるcommentアクションを用意する。
public function show($id)
{
    $topic      = Topic::where("id",$id)->first();

    #ここでコメントされている内容を抜き取る
    $comments   = Comment::where("topic_id",$id)->orderBy("created_at","desc")->get();

    $context    = [ "topic" => $topic,
                    "comments" => $comments
                 ];

    return view("show",$context);
}
public function comment(CreateTopicRequest $request, $id)
{

    Comment::create(array_merge( $request->all(), ["topic_id"=>$id] ));

    #↑と↓は等価

    /*
    $comment  = new Comment;

    $comment->name      = $request->name;
    $comment->content   = $request->content;
    $comment->topic_id  = $id;
    $comment->save();
    */

    \Log::debug("投稿完了");

    return redirect(route("topics.show",$id));
}
コメント投稿と閲覧ができるテンプレートを作る
resources/views/show.blade.phpにフォームと表示欄を作る。
@extends("base")

@section("main")

<div class="border my-2 p-2">
    <div class="text-secondary">{{ $topic->name }} さん</div>
    <div class="p-2">{!! nl2br(e($topic->content)) !!}</div>
    <div class="text-secondary">投稿日:{{ $topic->created_at }}</div>
</div>

<h2>コメント投稿</h2>

<form action="" method="POST">
{{ csrf_field() }}
<input type="text" name="name" placeholder="名前">
<textarea class="form-control" name="content" placeholder="コメント"></textarea>
<input class="form-control" type="submit" value="送信">
</form>

<h2>投稿されたコメント</h2>

@forelse($comments as $comment )
<div class="border my-2 p-2">
    <div class="text-secondary">{{ $comment->name }} さん</div>
    <div class="p-2">{!! nl2br(e($comment->content)) !!}</div>
    <div class="text-secondary">投稿日:{{ $comment->created_at }}</div>
</div>
@empty
<p>まだコメントはありません</p>
@endforelse

@endsection
アクションのルーティングを行う
routes/web.phpにコントローラで作ったアクションを追加する。
<?php

use Illuminate\Support\Facades\Route;

/*
|--------------------------------------------------------------------------
| Web Routes
|--------------------------------------------------------------------------
|
| Here is where you can register web routes for your application. These
| routes are loaded by the RouteServiceProvider within a group which
| contains the "web" middleware group. Now create something great!
|
*/

Route::get('/', function () { return view('welcome'); });


#Route::resource('/topics', 'TopicsController');


Route::get('/topics', 'TopicsController@index')->name('topics.index');
Route::get('/topics/create', 'TopicsController@create')->name('topics.create');

Route::post('/topics', 'TopicsController@store')->name('topics.store');

#↓追加
Route::get('/topics/{uuid}', 'TopicsController@show')->name('topics.show');
Route::post('/topics/{uuid}', 'TopicsController@comment')->name('topics.comment');

Route::get('/topics/{uuid}/edit', 'TopicsController@edit')->name('topics.edit');
Route::put('/topics/{uuid}', 'TopicsController@update')->name('topics.update');
Route::delete('/topics/{uuid}', 'TopicsController@destroy')->name('topics.destroy');
これで、1対多のリレーションを作ることができた。トピックに対してコメントの投稿と閲覧をすることができる。

ちなみに、トップページでトピックに紐付いているコメント数を表示させたい場合、下記のように書けば、表示できる。
@forelse( $topics as $topic )
~~省略~~
<div class="text-secondary">コメント:({{ $topic->comments->count() }})</div>
~~省略~~
@endforelse
commentsのメソッドはTopicモデルであるapp/Topic.phpに追加したから参照できる。
多対多のリレーションを作る
トピック作成時にタグを付与する。そのために多対多のリレーションを組む
タグのモデルを作る
まず、タグのモデルとマイグレーションファイルを作る。
php artisan make:model Tag --migration
タグのモデル(app/Tag.php)を作る。
<?php

namespace App;

#use Illuminate\Database\Eloquent\Model;
use GoldSpecDigital\LaravelEloquentUUID\Database\Eloquent\Model;

class Tag extends Model
{
     protected $fillable = [ "name" ];

     public function comments()
     {
         return $this->hasMany("App\Comment");
     }
}
多対多の場合、トピックのモデルまで書き換えなくても良い。
タグと中間テーブル(トピックとタグをつなぐ物)のマイグレーションファイルを作る
続いて、タグのマイグレーションファイル( database/migrations/XXXX_XX_XX_XXXXXX_create_tags_table.php )を作る。
<?php

use Illuminate\Database\Migrations\Migration;
use Illuminate\Database\Schema\Blueprint;
use Illuminate\Support\Facades\Schema;

class CreateTagsTable extends Migration
{
    /**
     * Run the migrations.
     *
     * @return void
     */
    public function up()
    {
        Schema::create('tags', function (Blueprint $table) {
            $table->uuid("id")->primary();
            $table->string("name",15);
            $table->timestamps();
        });
    }

    /**
     * Reverse the migrations.
     *
     * @return void
     */
    public function down()
    {
        Schema::dropIfExists('tags');
    }
}
タグテーブルのカラムは、id(UUID型)、name(文字列型)、タイムスタンプの3つ。
続いて、多対多に必要になる中間テーブルのマイグレーションファイル( `database/migrations/XXXX_XX_XX_XXXXXX_create_tag_topic_table.php )を作る。
php artisan make:migration create_tag_topic_table
中身はこんな感じ
<?php

use Illuminate\Database\Migrations\Migration;
use Illuminate\Database\Schema\Blueprint;
use Illuminate\Support\Facades\Schema;

class CreateTagTopicTable extends Migration
{
    /**
     * Run the migrations.
     *
     * @return void
     */
    public function up()
    {
        Schema::create('tag_topic', function (Blueprint $table) {
            $table->id();
            $table->uuid("tag_id");
            $table->uuid("topic_id");
            $table->foreign("tag_id")->references("id")->on("tags")->onDelete("cascade")->onUpdate("cascade");
            $table->foreign("topic_id")->references("id")->on("topics")->onDelete("cascade")->onUpdate("cascade");
        });
    }

    /**
     * Reverse the migrations.
     *
     * @return void
     */
    public function down()
    {
        Schema::dropIfExists('tag_topic');
    }
}
この状態で一旦マイグレーションをする。
php artisan migrate
ビューを作る。
タグを作るためのビュー( ./resources/views/create_tag.blade.php )を作る。
@extends("base")
@section("page_subtitle")新しいタグを作る|@endsection
@section("main")
@if( count($errors) )
<ul>
@foreach($errors->all() as $error)
<li>{{ $error }}</li>
@endforeach
</ul>
@endif
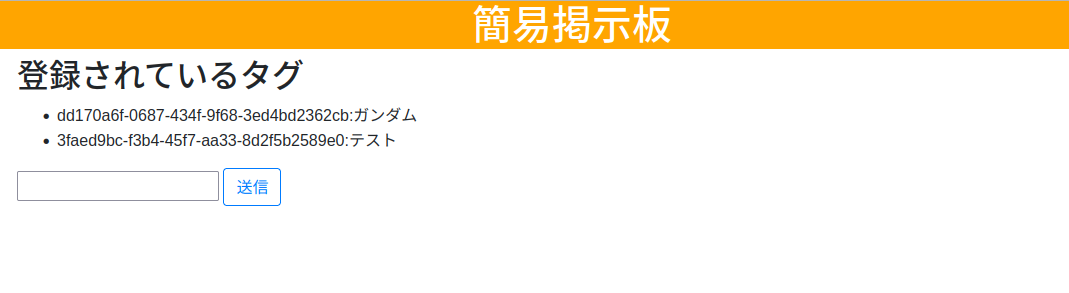
<h2>登録されているタグ</h2>
<ul>
@foreach( $tags as $tag )
<li>{{ $tag->id }}:{{ $tag->name }}</li>
@endforeach
</ul>
<form class="" action="{{ route('topics.store_tag') }}" method="POST">
{{ csrf_field() }}
<input class="" type="text" name="name">
<input class="btn btn-outline-primary" type="submit" value="送信">
</form>
@endsection
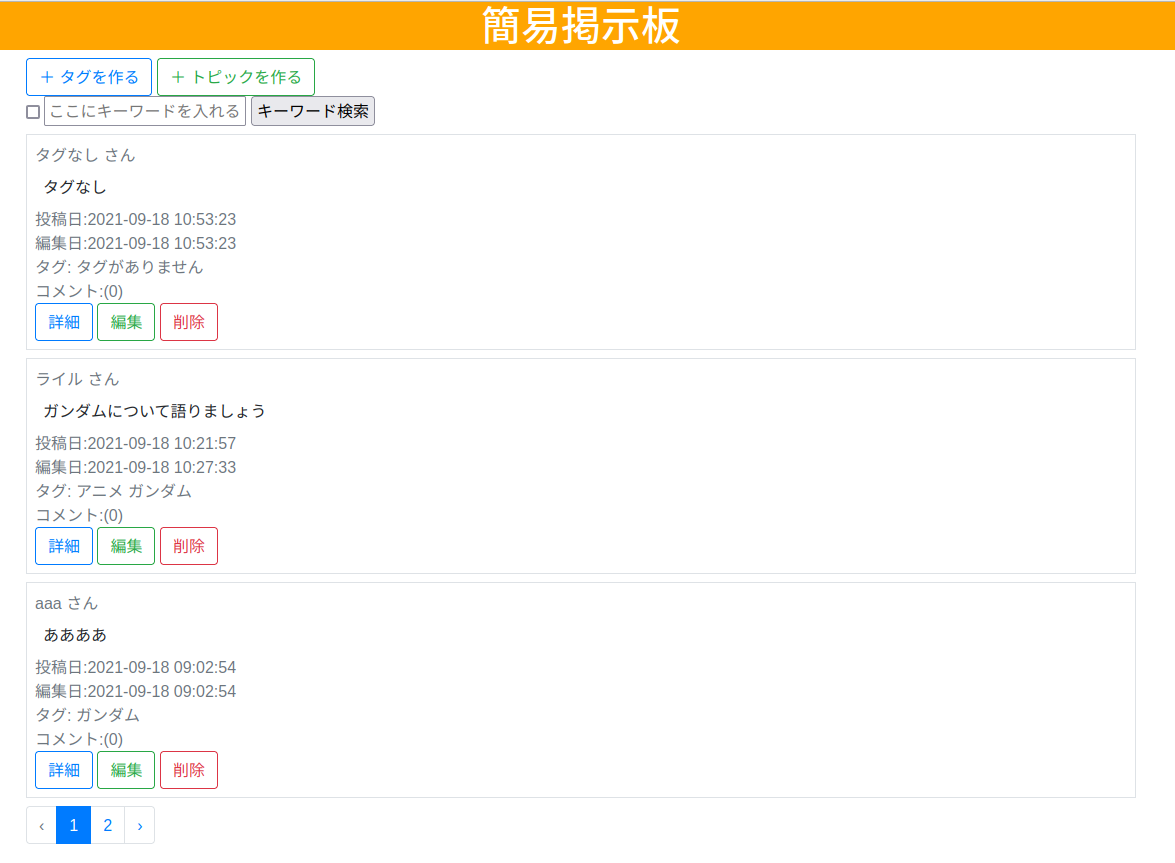
トピック一覧を表示するビューも書き換える。
@extends("base")

@section("main")

<a class="btn btn-outline-primary"  href="{{ route('topics.create_tag') }}">+ タグを作る</a>
<a class="btn btn-outline-success"  href="{{ route('topics.create') }}">+ トピックを作る</a>

<form action="">
    @if( request()->query("option") )<input type="checkbox" name="option" checked>
    @else<input type="checkbox" name="option">
    @endif
    <input type="text" name="search" placeholder="ここにキーワードを入れる" value="{{ request()->query('search') }}">
    <input type="submit" value="キーワード検索">
</form>


@forelse( $topics as $topic )
<div class="border my-2 p-2">
    <div class="text-secondary">{{ $topic->name }} さん</div>
    <div class="p-2">{!! nl2br(e($topic->content)) !!}</div>
    <div class="text-secondary">投稿日:{{ $topic->created_at }}</div>
    <div class="text-secondary">編集日:{{ $topic->updated_at }}</div>
    <div class="text-secondary">タグ:@forelse($topic->tags as $tag ) {{ $tag->name }}@empty タグがありません@endforelse </div>
    <div class="text-secondary">コメント:({{ $topic->comments->count() }})</div>
    <a class="btn btn-outline-primary" href="{{ route('topics.show',$topic->id) }}">詳細</a>
    <a class="btn btn-outline-success" href="{{ route('topics.edit',$topic->id) }}">編集</a>
    <form action="{{ route('topics.destroy',$topic->id) }}/" method="POST" style="display:inline-block;">
        {{ csrf_field() }}
        {{ method_field("delete") }}
        <button class="btn btn-outline-danger" type="submit">削除</button>
    </form>
</div>
@empty
<p>投稿はありません</p>
@endforelse

{{ $topics->appends(request()->input())->links() }}

@endsection
リクエスト作成
バリデーションのためのリクエストを作る
php artisan make:request CreateTagRequest
中身は下記
<?php

namespace App\Http\Requests;

use Illuminate\Foundation\Http\FormRequest;

class CreateTagRequest extends FormRequest
{
    /**
     * Determine if the user is authorized to make this request.
     *
     * @return bool
     */
    public function authorize()
    {
        return true;
    }

    /**
     * Get the validation rules that apply to the request.
     *
     * @return array
     */
    public function rules()
    {
        return [
            'name'      => 'required|max:15',
        ];
    }
    public function messages() {
        return [
            'name.required'     => 'タグ名を入力してください',
            'name.max'          => 'タグ名は15文字でお願いします。',
        ];

    }
}
コントローラの追加
コントローラを作る。
#冒頭に追加
use App\Tag;
use App\Http\Requests\CreateTagRequest;


~~~省略~~~


    # タグ生成関係
    public function create_tag()
    {
        \Log::debug("タグ生成画面");
        $tags  = Tag::latest()->get();

        return view("create_tag",[ "tags"=>$tags ]);
    }
    public function store_tag(CreateTagRequest $request)
    {
        Tag::create($request->all());

        return redirect(route("topics.create_tag"));
    }


    # トピック生成関係
    public function create()
    {
        $tags  = Tag::latest()->get();
        return view("create",[ "tags"=>$tags ]);
    }
    public function store(CreateTopicRequest $request)
    {

        \Log::debug("バリデーション結果");
        \Log::debug($request->all());

        #Topic::create($request->all());

        #Topicのデータを保存した後、タグとトピックの中間テーブルに保存。
        $topic              = new Topic;
        $topic->name        = $request->name;
        $topic->content     = $request->content;
        $topic->save();
        $topic->tags()->attach(request()->tags);

        return redirect(route("topics.index"));
    }
トピックにタグを指定できるよう、トピック生成関係のコントローラも同様に修正を行う。
ルーティングの追加
作ったコントローラを呼び出す。routes/web.phpに下記を追加
Route::get('/topics/create_tag', 'TopicsController@create_tag')->name('topics.create_tag');
Route::post('/topics/store_tag', 'TopicsController@store_tag')->name('topics.store_tag');
タグを追加してみる
これでタグの追加ができる。
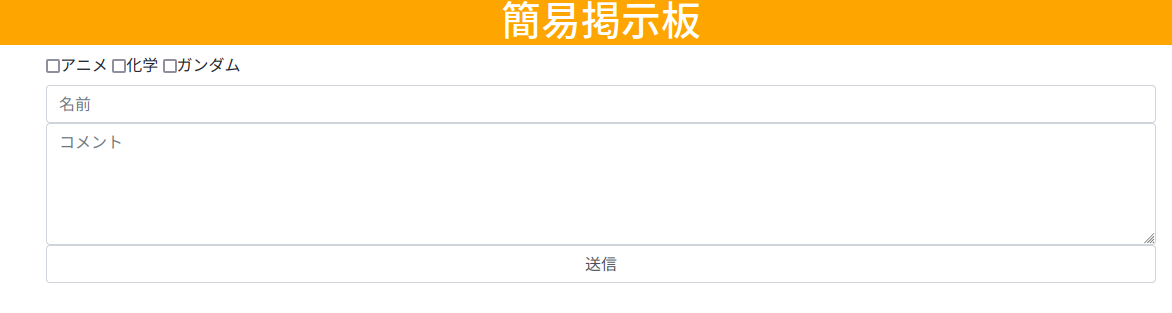
そして、作ったタグを指定することもできる。
トピックのフォームはこんな感じ。登録したタグがチェックボックス形式で並んでいる。(※下記画像は上記画像にて登録したタグからDBを書き換えた後なので全く違う。)
タグを指定するとこんな感じ。
結論
多対多の表示と格納について触れているサイトが少なかったのでまとめておいた。
コントローラのトピック保存処理がやや回りくどい感じがするが、他にいい方法が思いつかなかったので、この辺りで〆ることにした。
投稿するコンテンツにカテゴリを指定したり、タグを追加したりするなど、1対多もしくは多対多のリレーションのウェブアプリは割と多い。本格的に開発を始めたいのであれば覚えておきたいところだ。